Welcome to the DFO World Wiki. With many major updates since the release of DFO, many items are missing. Visit Item Database Project to learn more.
Please remember to click "show preview" before saving the page.
Thanks for the updated logo snafuPop!
Hell Mode
Hell Mode is a special mode in DFO/DNF that allows you fight extraordinarily hard enemies for a chance at some pretty good rewards, most notably, Epic equipment. Outside of some special methods, this is the only way to obtain Epic equipment.
Nexon has recently put up a guide concerning Hell Mode: http://dungeonfighter.nexon.net/Magazine/Content.aspx?boardNo=600&contentNo=007wa
Contents
How to Encounter
Hell Mode can be encountered in one of two ways:
- Random: The first way is to simply encounter it randomly. The chances of encountering it increase with more party members.
- Forced: The second way is to force Hell Mode. This is done through quests given by Grandis, which upon completion, will unlock Hell Mode for a set of dungeons.
Hell Mode will only appear in dungeons from Sky Tower onwards (meaning they're not in Grand Flores and Lorien).
Forcing Hell Mode
In order to force Hell Mode, you first must unlock it via quests given to you by Grandis. These have you going through and defeating the bosses of the general area (Sky Tower, Behemoth, and Aphelia). After that, you can then enter Hell Mode by having the appropriate Stone. Otherwise, you can have the Stone, but not be able to force Hell Mode.
In order to get a stone, you'll need either Demon Scrolls or Invitations. These drop off bosses and come in three varieties.
- Sky Tower: Fire Demon Scroll & Blaze's Invitation - 8 Invitations/Scrolls = 1 Evil Quelling Stone of Fire
- Behemoth: Water Demon Scroll & Miasma's Invitation - 12 Invitations/Scrolls = 1 Evil Quelling Stone of Water
- Aphelia: Earth Demon Scroll & Nightshade's Invitation - 15 Invitations/Scrolls = 1 Evil Quelling Stone of the Earth
The Invitations are untradable, but the Demon Scrolls can be traded to other players. You can also trade in the Demon Scrolls for other scrolls (Fire > Water > Earth). Both the Invitation and Scrolls can be traded in for Stones that will allow you to force Hell Mode. After forcing Hell Mode, the Stone is used up. You can also do this in a party, but everyone needs the appropriate stone.
What to Expect
If you've encountered Hell Mode, you'll get a notice at the start of the dungeon. A pink boss symbol will appear on the map, indicating where the Hell monsters are located. You'll also see a box with "Sealed Gate Progress" and a number. If you get hit more than the number listed (say 50 times), you'll be unable to break the Sealed Gate, and no goodies for you. Once in the room, you'll notice a sealed container. After all the normal enemies have been cleared in the room, you can choose whether or not to hit it. Basically, Hell Mode is optional. After hitting the Sealed Gate, it'll react, and some Fallen Guardians will pop out of it. After defeating them, hit the Sealed Gate some more. Eventually, the Hell Demon will pop out, and you'll do battle with it. If you're lucky, it'll drop some nice items upon defeat.
The Demon that pops up depends on the stage (Sky Tower, Behemoth, Aphelia, Mount Thunderime, and so on).
Hell Monsters
Fallen Guardian
Appear when you hit the Sealed Gate. These guys should be your first priority as they can cause major issues. Can summon a staff that deals constant damage if you get close, but it can be destroyed. Fallen Guardians can also put you to Sleep. Can also become immune to damage for a short period; it'll turn black when this happens.
Blaze
Likely the first Hell Demon you'll come across. Specializes in the Fire element. He appears in Sky Tower's Hell Mode. Interestingly enough, if you save one of your GSD quests, you can have him fight Blaze instead. Later patches will fix that issue however.
Attacks
- Flame Aura: Special Aura that causes Burn status and deals damage if you get close to Blaze.
- Normal Attacks: Can cause Burn status
- Summon Meteor: Summons a Meteor to fall upon the field. The Meteor then spawns Ador that will come and attack you. The Meteor can be destroyed, but it can cause damage by being close to it. Blaze can call upon multiple Meteors.
- Ador Kamikaze: The Adors summoned from the Meteors can home in on a character and blow up.
- Flame Bullets: Blaze shoots Flame Bullets from his hands that can home in your character. However, these do have a limited range and can be avoided.
- Damage Negate: Can negate damage from certain attacks.
Miasma
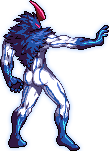
Likely the second Hell Demon you'll come across. Specializes in Water and Thunder attacks. Appears in Behemoth's Hell Mode.
Attacks
- Vapor Aura: Decreases Attack Speed by 10% when close to Miasma.
- Summon Dark Cloud: Summons a Thundercloud that will hang over a targeted area. If your character gets within the area of the cloud, it'll launch Thunderbolts at your position. Simply try to stay away from it.
- Haze Mass: Launches a mass made of steam that homes in on your position. Has no hitstun, but will inflict continuous damage and slow your attack speed if it hits your character. Your only option to avoid damage is to try and run from it or hit the mass with a Fire or Water attack.
- Water Drop Prison: Throws a water drop that can trap you. It's imperative to try and escape quickly, as it can cause 30% HP damage when it bursts after 7 seconds. The bubble can be destroyed by other players, otherwise, you'll be forced to take damage.
- Summon Aejorines: Miasma summons Aejorines (Succubus-type monster) that will attack you with ranged attacks. It's best to try and take them out quickly as they increase Vapor's HP recovery rate.
Nightshade
The Hell Demon that resides in Aphelia. Generally the most melee friendly of the bunch. Specializes in using Plants to attack.
Attacks
- Drain Aura: Decreases MP Regeneration to 0 when close to Nightshade
- Summon Aukuso: Summons a Hellflower Aukuso; Can shoot out Confusion Gas and Poisonous Insects, as well as attack from range.
- Shoot Bug: Shoots a bug from his hand; easily avoidable as flies in a straight line.
- Vine Capture: Can summon vines that immobilize you in place. These can be destroyed.
- Seed Spread: Spreads out numerous seeds over the ground. These then grow into Aukusos. After about a minute, if they haven't been killed, they will then become Meinahrut (Succubus-type monster) whose attacks can immobilize you.
- Summon Sun: Summons a large Sun; it can accelerate the growth of Nightshade's seeds. Nightshade will only use this attack once he's fallen below 1/2 of his max health.
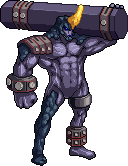
Dark Steel
Attacks
- Gravity Aura: Slows movement speed & jump strength when close to Dark Steel.
- Steel Beam Drop: Dark Steel leaps into the air drops Steel Beams onto the ground. This is followed up by Dark Steel falling back to the ground and attacking. This can cause the Burn effect if hit and has an effective AoE range. Dark Steel can drop a lot of Beams, and they can be destroyed.
- Summon Thundercloud: Summons a Thundercloud; similar to Miasma's attack, but unleashes much larger Thunderbolts and they hit random spots regardless of whether a character is in it's general area.
- Shockwave: Dark Steel slams his beam into the ground and creates round shockwaves that go forward a distance.
- Wide Swing: Dark Steel's normal attack; swings his large beam forward and reaches behind him. Has pretty good range on it.
Hell's Party
(Note: Not implemented in US version yet)
This is a revamp of Hell Mode that comes out in a later patch. It generally replaces the Hell Demon encounters with enemy APC parties. It also has different difficulties, with the Hell Demons now appearing on the hardest difficulty. Enemies may drop materials you can use to trade in for Epic equipment at Grandis.


