Welcome to the DFO World Wiki. With many major updates since the release of DFO, many items are missing. Visit Item Database Project to learn more.
Please remember to click "show preview" before saving the page.
Thanks for the updated logo snafuPop!
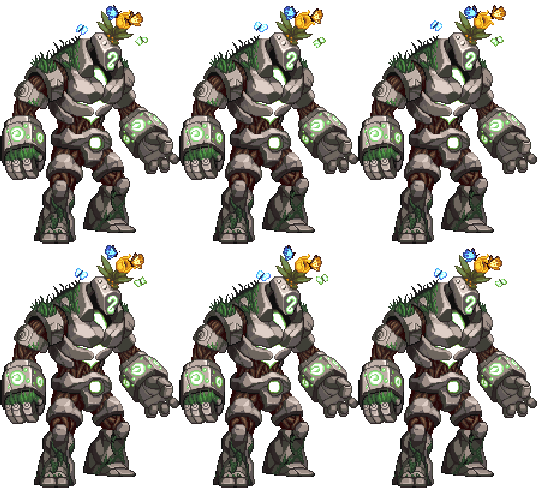
Omega Guardian
Lore
Prey-Isys Raid Lore:
There was an ancient temple somewhere on the golden star, Tayberrs, that even Lupsong didn't know when it was built. Its doors were always shut, and they never budged, even if someone tried to open them. But on the day when Prey reached the highest place in the sky for the first time, the temple doors opened on their own as if in celebration.
The Omega Guardian walked out of the doors and welcomed Prey in person as he descended upon the ancient temple. Afterward, the doors stayed open for a long time, with the Omega Guardian serving as temple guardian. When Isys woke up and flew into the sky, his shadow covering all of Tayberrs beneath him, the ancient temple didn't congratulate him.
Having taken offense at this, Isys decided to punish the temple and soared into the sky. The Omega Guardian closed the doors to the temple, and stood in front of them as Isys descended from the sky, with a distant look in his eyes as if he was remembering the day that he welcomed Prey.
Move Set
- Thermal Beam: Omega fires out a energy beam in a circular motion.
- Stone Throw: Omega picks up a giant stone from underneath the ground and throws it forward.
- Totems: Omega Guardian is assisted by four totems that float around the room, they too have different attack patterns:
- Laser Beam: All four Totems will fire out a green laser beam in front of them.
- Ground Strike: Totems will charge up to slam the ground with a circular AoE indicator.
- Sky Laser: During Omega's Charge pattern, the Totems will often fire out lasers into the sky and they'll drop down in a random position.
- Berserk
- Quadruple Grapple: Omega will push back players and begins to charge at them. This pattern is quite similar to Lava Monster Worm's Triple Charge where he'll rush at their position around four times in an attempt to grab them. In order to make Omega groggy, all players must hide behind the Totems nearby to trick him into throwing them away causing a message "Guardstone Barrier weakened" to prompt. Once Omega has charged four times, he will enter his groggy phase for 20 seconds, with the amount of defense reduction being dependent on how many Totems he hit while charging.
Strategy
- Omega Guardian isn't very difficult to face and his Totems have easily telegraphed attack patterns, but watch for their warning indicators.
- Reserve your stronger skills and use sustained ones during his fight.
- Do not leave yourself open during Quadruple Grapple. You or any party member will receive a heavy amount of damage if Omega charges and grabs at anyone who's not hiding behind a totem.
- To ideally 1-cycle Omega, coordinate with your party to have him throw out all four totems as it causes a significant reduction in his defenses each time this occurs. However, if there's remaining totems due to a player getting caught by Omega's Grapple, he'll still enter his groggy phase only with a slight reduction.
- Once he becomes groggy, have the Crusader/Enchantress deploy
 Apocalypse/
 Crux of Victoria/
 Marionette and kill Omega before he starts up his patterns again.
Quotes
Media
Voice Lines:
