Welcome to the DFO World Wiki. With many major updates since the release of DFO, many items are missing. Visit Item Database Project to learn more.
Please remember to click "show preview" before saving the page.
Thanks for the updated logo snafuPop!
Difference between revisions of "Forgotten Land"
(→Mechanics) |
(→The Chaser) |
||
| Line 82: | Line 82: | ||
*Defeating him will reward you with '''10''' Keys | *Defeating him will reward you with '''10''' Keys | ||
*Even if he is defeated, he will return the next night. | *Even if he is defeated, he will return the next night. | ||
| + | *You can either use '''Indulgence''', kill him with '''Warden Authority''', kill him as is or leave the area RIGHT when he gets in your field - making him stuck there all night. | ||
=== Forgotten Land-Only Items === | === Forgotten Land-Only Items === | ||
Revision as of 20:45, 5 August 2015
| Forgotten Land | |
|---|---|

| |
| Location | Underfoot |
| Min. Level | 25 |
| Level | 25-86 |
| Monster Level | 25-86 |
| End Boss | Abyssal Hydracle, Chaos Shauta, Raging Kinoll, Snow Mountain Sasquatch, Dr. Moreau, Immortal Witch Ellen and one of the following three:
Stone Guardian Arc OR Flame Soltareusi OR Slime Summoner Chop |
Contents
Description
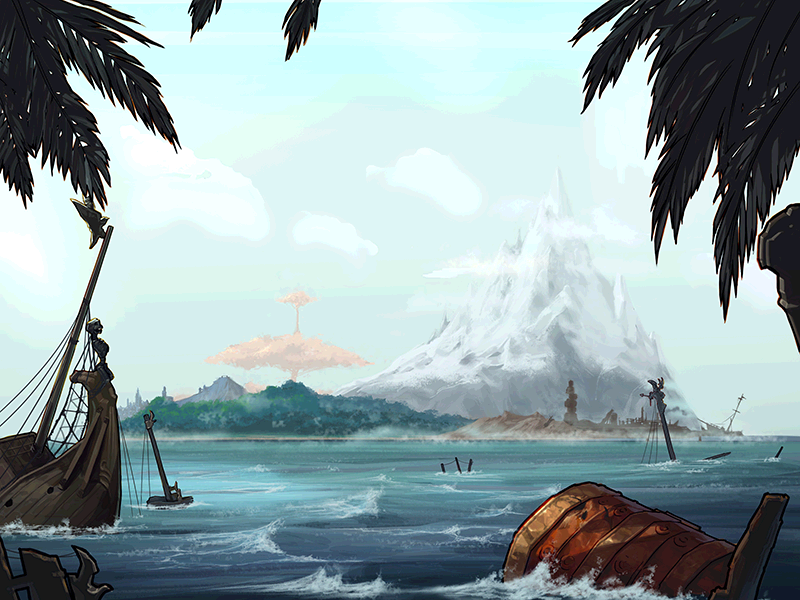
Forgotten Land is a dungeon you can enter starting at level 25. Players are given 30 minutes to try to gather as many crystals and other loot that they can across a big island that contains 5 different zones of different levels while fending off some ferocious creatures.
Mechanics
- This dungeon does not burn FP or cost FP to run per room.
- You can enter once a day for free. After you burn 100 FP you will get a ticket that will allow you to re-enter when it is used.
- You do not have to clear all monsters in a room to move onto the next room.
- All monsters except bosses will respawn given enough time.
- Each zone is separated by level. Monsters in zones below your level will scale up to your level. They are by follows:
- Deathly Harbor: Level 25+
- Forest of Disorder: Level 35+
- Mt. Snowflakes: Level 45+
- Vanished Village: Level 55+
- Witch's Garden: Level 80+
- There is Day/Night in this dungeon. Areas will be affected by the time change and during the Night a tough Werewolf known as The Chaser will pursue you.
- After killing enough mobs you will get a buff that massively lowers Cooldowns.
- All monsters drop crystals that you will automatically loot when you run over them
- There are Keys that drop off of named mobs that you can use to open chests.
- Skeleton Keys can also drop in the area as well as giving Mileage points.
General Strategy
First thing to know about Forgotten Land is its exclusive hud elements:
- 1. Boss List: This will show the silhouettes of all 5 main bosses. As you defeat them they will light up and when all 5 are defeated it will get replaced with a picture of the Treasure Goblin.
- 2. Fever Meter: Fever will build up as you kill Monsters. When it is full you will get a 1 minute long buff that massively lowers all your cooldowns and massively increases movement/casting/attack speeds for the duration.
- 3. Day/Night cycle and Timer: Every 2 minutes it will switch between Day and Night. You start Forgotten Land at the Day but when it switches to Night cycle various effects will happen across the map and The Chaser will start chasing you. You have 30:00 minutes to explore the whole Island and when the timer runs out the Dungeon will end.
- 4. Treasure Keys and Crystals: Treasure Keys drop off of named mobs and The Chaser in Forgotten Land and are sometimes awarded when completing objectives in each area. They can be used to open up Silver Chests (1 Key) and Golden Chests (5 Keys, rare spawn after boss deaths). The crystals drop off of mobs and are a different color based on what area it is:
- Blue - Deathly Harbor
- Red - Forest of Disorder
- White - Mt. Snowflakes
- Black - Vanished Village
- Gold - Witch's Garden
- Rainbow - Named Mobs, Bosses, Treasure Chests
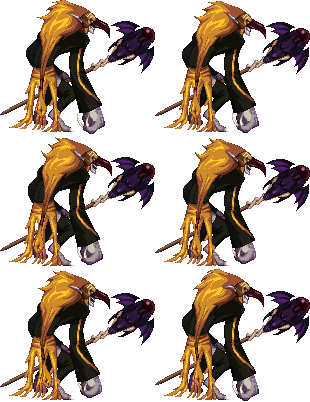
The Chaser
This named mob will chase you through all of Forgotten Land during the Night cycles. His current location is displayed on the minimap. He will steadily and randomly move through rooms until he enters the same room you are in. If you move to another area, he will teleport to that area, possibly ending up in the same room as you.
- Level: Scales with your Level
- HP: Scales with your level but always has 27 bars of Health.
Some rules about him:
- He will only chase you during the Night. Once day time hits, he will vanish even if he's in the same room as you. Keep this time limit in mind if you want to kill him because he can flee while you're battling him.
- If he ends up in the same room as you, he will lock the exits and you won't be able to escape unless you kill him, he kills you, use the Indulgence item, or use a teleport capsule.
- He is notorious for having an extremely high level bleed. You must take some sort of status cleanse or you will die from the bleed damage alone.
- He is vulnerable to status effects. It is possible to chain stun and freeze him if you're trying to avoid getting killed by him.
- He cannot enter Buildings or any other Hidden Rooms. Use this to hide from him if you don't want to fight him.
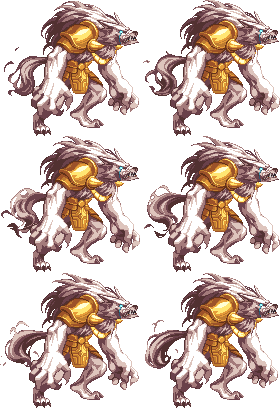
- Defeating him will reward you with 10 Keys
- Even if he is defeated, he will return the next night.
- You can either use Indulgence, kill him with Warden Authority, kill him as is or leave the area RIGHT when he gets in your field - making him stuck there all night.
Forgotten Land-Only Items
Coming Eventually
Map
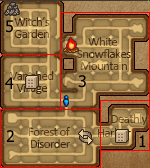
| Map | ||
|---|---|---|
|
Deathly Harbor: |
1 |
Dungeon Areas
Deathly Harbor (Level 25)
"The seaside town must have been once a civilized and bustling one, but now there are only dreary winds and piled skulls. The dead built their nests in each building to avoid the light. and they are waiting for their preys till the night comes.
The shadow of the dead seeking living sacrifices must be lifted."
Night Cycle difference: The decomposed puppets on the ground will come to life during the Night.
When you enter Forgotten Land you will begin here. In the first room to your left there will be green footprints on the floor and a dialogue that comes up. Follow the green footprints into the building. When inside the building, continue to follow them until the 4th room. In the 4th room there will be a cage with a Mermaid Girl in it. Break the cage open and you will be sent back to the start. She will be standing there now and when you stand on top of her she will use a tornado that will send you to the first mini-dungeon: Aquatic Ruin.
Monsters:
- Phantom Ghost (Invulnerable)
- Short Sword Ghost Puppet (Night Cycle only)
- Whip Ghost Puppet (Night Cycle only)
- Mace Ghost Puppet (Night Cycle only)
- Ax Ghost Puppet (Night Cycle only)
- Raging Magister
- Oppressed Follower
- Forest Zombie
Named:
- Burning Fiend
- Painful Pigra
- Cold Wans
Aquatic Ruin
First thing you will notice is that this area has low gravity. The low gravity works much like Durban and Humiliation Reef.
Inside the ruin you will meet the Mermaid's father. After a brief dialogue continue through the dungeon and at the end room will be the first boss. After defeating Great Sea He'etako, do not warp out, go back to the Mermaid's father and he will reward you with 2 keys before disappearing. Walk back to the Mermaid and she will create a whirlpool to take you back to Deathly Harbor.
Monsters:
- Leatherback
- Krokan
- Magpie Blowfish
- Siren Spearman
- Sharkade Blue
Boss: Abyss Hydrackle
Minimum Boss Level: 40
The boss is red palette swap of Hydracle. He borrows alot of his attacks from Great He'etako and Hydracle but is relatively simple to deal with. Underleveled characters need to watch out for his Freeze because it has a minimum level of 40.
Forest of Disorder (Level 35)
"A forest taken by monsters where there is full of the metastatic spirit, countless monsters have gathered to feed on it.
Shauta who leads the group of Taus expelled the other monsters to conquer the forest alone. Angry goblins united under Kinoll, their leader, to stand aganst the Taus.
Their greed must be stopped and this disorder must be quelled."
Note: You do not have to beat both bosses in this area to reach the Tower of Overwatchers. Only one boss has to beaten.
Night Cycle Difference: The Chaser Shadows will spawn and will start attacking anything around them. Unlike the actual Chaser, these are very easy to kill and don't deal that much damage.
In the first room of this area there are two shopkeepers, a goblin and a tau. They sell Green Goblin Transformation Potion and Orange Tau Transformation Potion for 15 Red Crystals each. You need this to be able to enter the mini-dungeons to fight the bosses. If you do not have enough Red Crystals you can also kill mobs and they have a chance to drop them. Mobs in the upper area of the forest will drop the Goblin Potion and mobs in the lower area will drop the Tau potion. Do not immediately use them since their disguises don't last long. When you reach the end of the forest there will guards blocking the doors. Use the disguise potion that corresponds to the correct area (Green Goblin Potion for Kobolt Gaurd and Orange Tau Potion for Boar Guard) and they will move aside and let you in.
Note: If you are playing any class that uses summons, disable their attacks before using the disguise otherwise they will attack you. You can still be juggled and hitstun while disguised.
Monsters:
- Night Mad Wolf (Night Cycle only)
- Spirit Goblin Guard
- Earth Goblin Guard
- Spirit Goblin Captain Trooper
- Earth Goblin Captain Trooper
- Elite Goblin Archer
- Elite Goblin Captain Trooper
- Mutated Goblin Archer
- Tau Warrior
- Tau Assaulter
- Kurogaru
- Sirogaru
- Rolling Kobold
- Kobold Water Supplier
- Bandit Orc
- Bandit Orc Archer
- Ordinary Spirit: Selist
Named:
- Single Shot Shooter Shu
- Reddened Orc Darin
Burning Forest/Frost Forest
These two mini-dungeons are identical in that they're both two rooms that lead up to the boss. You should still be disguised so just run past the monsters into the boss room. When you enter the boss rooms the boss will see through your disguise and the it will end instantly allowing you to be able to hit them.
Bosses: Raging Kinoll, Chaos Shauta
Minimum Boss Level: 55
These two bosses have the same exact moves as Lightning Kinoll and Tau King Shauta. They can be rather durable if you're trying to fight them underleveled but overall should not be too difficult. Magic classes do have to be aware while fighting Angry Kinoll since he does have a permanent Revenge of Light buff on.
Monsters:
- Rolling Kobold
- Kobold Water Supplier
- Tau Warrior
- Tau Assaulter
- Kurogaru
- Sirogaru
Named:
- Felon Ogre
Mt. Snowflakes (Level 45)
"The mountain that freezes even breath. These days, some of living things were discovered in the middle of severely intense coldness. Taironia Guild, a group of prestigious Adventurers as well as researchers for the Metastasis, dispatched an expedition team.
However, all the communication from the expedition was lost soon after. It is not yet clear whether they are still alive or not. They have to be rescued from the Sasquatches at the very top of the food chain."
Note: The hidden boss is not required to reach the Tower of Overwatchers, only Black Snow Sasquatch is.
Night Cycle Differences: Ice Tigers will spawn during the night in almost every room. In addition, the player will be afflicted with a movement/attack/casting speed debuff.
This area is fairly simple compared to the other ones. There's no requirement to get to the boss, you can simply run into his room and fight him. While it lacks it's own mini-dungeon it has a few secrets to make up for it:
1. Giant Block of Ice: In one room you will notice a giant block of ice blocking a portal. The only way to break it is to inflict enough Fire Damage to it. If you do not have any Fire Damage you can go to the Campfire on the mini-map near the boss room and stand on top of it to get an Inflict Fire Damage buff. Behind the block of ice contains a hidden cavern with a bunch of Frost Golems and 3 Treasure Chests

2. Hidden Boss, Ice Rock Khun: In the room below the boss room there are four panels of ice. They will send you flying if you run over them with the exception of one. This one will be darker than the others and when you step on it you will be sent to a hidden room to fight the hidden boss.
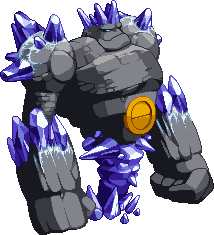
Ice Rock Khun
Hidden Boss: Ice Rock Khun
Minimum Boss Level: 65
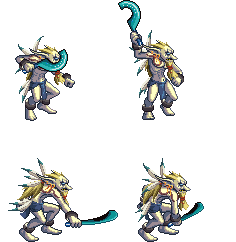
Khun can be a very challenging opponent. He has most of the same moveset as Ice Golem Ryku but with a new attack. He can inflict a high level freeze on you and then follow up with an alteration of Astral Storm that only shoots Ice Crystals. They do alot of damage on impact and their explosions are lethal. The best way to avoid this is to keep your distance from Khun and watch for when he becomes invulnerable since he will become invulnerable before doing an aoe freeze. Defeating him will reward you with 3 keys. When you leave the cave you will be in the top right corner of the map.
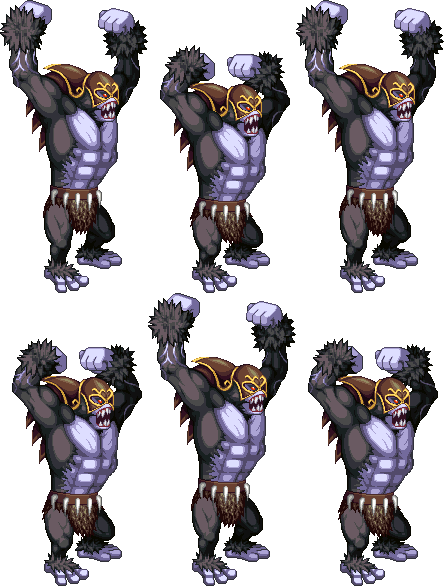
Mountain Sasquatch
Boss: Mountain Sasquatch
Minimum Boss Level: 65
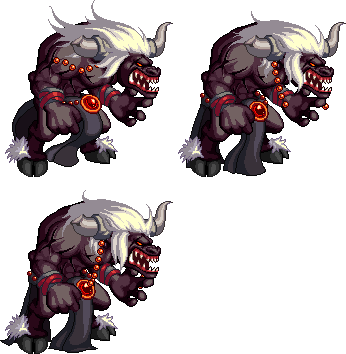
This boss works just like Sasquatch. The main thing to watch out for is that unlike other bosses he is out in the open that can be affected by the Day/Night Cycle. This means if Night Cycle hits that The Chaser can appear and he can still show up in the room while you're fighting the boss. Hold onto items to ward away The Chaser to prevent this from happening.
Monsters
- Ice Tiger (Night Cycle only)
- Ice Tree
- Yeti
- Ice Ball Louie
- Ice Zombie
- Naias
- Ordinary Spirit Ratria
- White Centaur Warrior
- White Centaur Magician
- Slaughterer
- Ice Hermit Crab
- Greenring
- Storm Golem
- Ice Golem
- Thunder Golem
- Khun's Shard
- Troll Guardian
- Fire Troll
Named:
- Tarantula
- Icicle
- Ice Spirit Shuske
Vanished Village (Level 55)
"A graveyard for adventurers; this is the particular area where many of them have disappeared. Dense fog always covers the streets and this not just any ordinary fog. This is an evil smog of death, created by a mad scientist that ruined the village.
After being expelled from the field of Science, Dr. Moreau continued to use living human beings for his experiment. This lunatic must be stopped from creating more innocent victims."
Nightime Cycle Difference: The statues that are normally idle will come to life and will start attacking you on sight.
When you enter this area you will see a cutscene happen between a Male Slayer and Assistant Montgomery. Assistant Montgomery will push him onto a manhole and the slayer will turn into a Failed Test Subject. Killing the Slayer and following Assistant Montgomery are not needed to clear this area. There are 3 buildings you can enter in this area, each with a named mob in side. One of them will have a 3 digit code written in White on the wall. The building with the code is completely random and the code itself is random. When you see the code, remember it and head towards the center of the town. There will be 3 wheels with numbers floating above them. Defeat all the monsters in the room and then set the three wheels to the 3 digit code that was written on the wall. Once the code matches the door to the town hall will open and you will be able to fight the boss.
Note: Watch out for the manholes. They can turn you into an Failed Test Subject which will stall you for time.
Boss: Dr. Moreau
Minimum Boss Level: 79
This can be one of the most challenging bosses in Forgotten Land if you are under leveled since he is level 79. Unlike the other bosses, he is actually a new monster that's a resprite of Chief Sas from Ghost Train but with different attacks:
- Throw: He will put his arms in front himself to pick you up and throw you. This has a farther range than it appears and it can interupt most skills.
- Potion Toss: He will throw a potion that leaves a poisonous puddle behind. This inflicts an incredibly high level poison.
- Summon Nemesis: He will summon a bunch of Melted Test Subjects which are basically Melted Warriors from Reshpon, Village of Pain. Just like in Reshpon, these do extremely high damage and are hard to kill but do not require fire damage to kill.
- Open Jacket: He will open his jacket and let out infectious fumes. If you get hit you will turn into an infected villager for a brief moment and he will heal great amount of hp to himself.
After he is defeated his prison room will open up. Inside will be Dr. Herbert and 4 Treasure Chests. Dr. Herbert can exchange your colored crystals for higher colored crystals (For example you can give him 3 Blue Crystals for 1 Red Crystal).
Monsters:
- Failed Test Object
- Mysterious Statue
- Lab Mummy
- Test Object: Nemisis
- Mutant Ratman
- Giant Rat
- Lab Ant
Named:
- Assistant Montgomery
- Test Object: Aisa
- Test Object: Azazello
Witch's Garden (Level 80)
"The jungle full of bizarre monsters mutated due to high exposure of metastatic spirit. Carnivorous plants mock adventurers and want to devour them and under the sunlight, the monsters become even more ferocious.
Expelled from Arad for her black magic, which is forbidden by law, Witch Elene escaped to this island where she continues her forbidden experiment on eternal youth and immortality.
The witch must be found and removed from this world."
Night Cycle Difference: The Witch's Hunters will be massively weakened during the Night while the Witch's Dendroids will be immobile (except Dendroid Elder) during it.
When you enter the area, you will see the Immortal Witch Elene. She will taunt you before leaving through the door. Follow her to the top left corner of the garden where you will run into Serpentina. Defeat Serpentina and she will break the statue blocking the way to the Witch's Temple.
Monsters:
- Hunter
- Treasure Hunter
- Aggressive Camouflaged Goliden
- Stone Snake
- Gargoyle
- Gargoyle Spearman
- Collection Tree
- Mini Marpisa
- Slayer Statue
- Mage Statue
- Gunner Statue
- Fighter Statue
- Priest Statue
Named:
- Rolling Hunter Gareth
- Dendroid Elder
- Serpentina
Lost Altar
This four room dungeon is simple to understand. Just get to the end room to fight the final boss of Forgotten Land.
Boss: Immortal Witch Elene
Minimum Boss Level: 85
Compared to Dr. Moreau, Elene is a pushover. She has the same exact moves as Agram the Witch but her's are much weaker and she does not attack as often so she should provide any challenge even if you are underleveled. She's generally evasive for all elemental selections.
NOTE : When she starts to attack, she chooses one of her elemental beads for the whole time shes alive.
Green: She does absolutely NOTHING - only teleports behind you for her hair slap. Highly resistant to abnormalities.
Blue: She has HIGH defense when she's standing in the snow. Icicles randomly appear onto your position in the snow.
Red: ---
Monster:
- Slayer Statue
- Mage Statue
- Gunner Statue
- Fighter Statue
- Mimic
Named:
Stone Pais
Tower of the Overwatchers (level 85)
"A forgotten island with many mysteries
It is easy to be deceived by its various forms
but there are watchers who monitor and manage everything on this island.
The Overwatchers who have 3 different forms guard the island from their tower.
Maybe, the secrets of this island could be revealed by them.
You have to find out how to get into the Tower of Overwatchers and defeat them.
There is only one way to reach them.
The clues can be found from the five boss monsters who contracted with the Overwatchers."
When you defeat all 5 main bosses of Forgotten Land, the treasure goblin will appear and he will become attackable. Upon defeat he will throw out a portal. This portal will take you to the Tower of the Overwatchers which will have one of three bosses. Upon defeat, all bosses will drop a different piece of an accessory fragment to craft the Forgotten Land Accessories. There is a very rare chance that they will drop a fully completed Forgotten Land Accessory.
Note: The order of boss defeat does not matter. He will always show up at the 5th boss that was defeated. Fight THESE bosses during your FEVER which can be obtained by going back one room and killing the remainder enemies - with your Kill bar almost full. Especially Stone Guardian Arc.
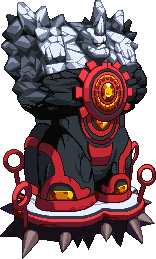
Stone Guardian Arc
Minimum Boss Level: 87
This boss will attempt to flood the room with Lava Crystals. These crystals can be destroyed by dealing damage to them. His other attacks include lightning strikes and flame pillars. All of these attacks are heavily telegraphed so avoiding them should be no big deal.
Flame Soltareusi
Minimum Boss Level: 87
His main attack is that he'll start inhaling and will then spit out huge lava pools. He will continue to teleport around the room and spit out lava pools. Keep on moving and don't stand in them for too long.
Slime Summoner Chop
Minimum Boss Level: 87
He will attempt to summon every possible slime from across the entire game. Each slime deals a different status and can be rather annoying to kill. Focus on killing Chop before he overruns you with his slime army.
