Welcome to the DFO World Wiki. With many major updates since the release of DFO, many items are missing. Visit Item Database Project to learn more.
Please remember to click "show preview" before saving the page.
Thanks for the updated logo snafuPop!
Difference between revisions of "Male Priest"
| Line 26: | Line 26: | ||
# Hunt [[Ghoul Guish]] on expert road or higher in [[Shadow Thunderland]] | # Hunt [[Ghoul Guish]] on expert road or higher in [[Shadow Thunderland]] | ||
| − | + | {{:Priest/Skills}} | |
| − | |||
| − | { | ||
| − | |||
| − | |||
| − | { | ||
| − | |||
| − | |||
| − | |||
| − | |||
| − | |||
| − | |||
| − | |||
| − | |||
| − | |||
| − | |||
| − | |||
| − | |||
| − | |||
| − | |||
| − | |||
| − | |||
| − | |||
| − | |||
| − | |||
| − | |||
| − | |||
| − | |||
| − | |||
| − | |||
| − | |||
| − | |||
| − | |||
| − | |||
| − | |||
| − | |||
| − | |||
| − | |||
| − | |||
| − | |||
| − | |||
| − | |||
| − | |||
| − | |||
| − | |||
| − | |||
| − | |||
| − | |||
| − | |||
| − | |||
| − | |||
| − | |||
| − | |||
| − | |||
| − | |||
| − | |||
| − | |||
| − | |||
| − | |||
| − | |||
| − | |||
| − | |||
| − | |||
| − | |||
| − | |||
| − | |||
| − | |||
| − | |||
| − | |||
| − | |||
| − | |||
| − | |||
| − | |||
| − | |||
| − | |||
| − | |||
| − | |||
| − | |||
| − | |||
| − | |||
| − | |||
| − | |||
| − | |||
| − | |||
| − | |||
| − | |||
| − | |||
| − | |||
| − | |||
| − | |||
| − | |||
| − | |||
| − | |||
{{NavClasses}} | {{NavClasses}} | ||
[[Category:Characters]] | [[Category:Characters]] | ||
[[Category:Priest]] | [[Category:Priest]] | ||
Revision as of 16:22, 19 September 2009
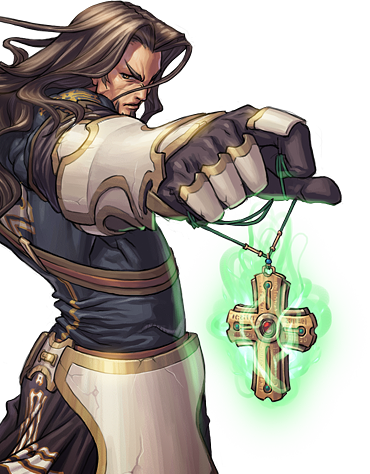
The Priest is a powerful warrior who has dedicated his life to holy pursuits, namely the eradication of evil. He is driven by a single mission: to prevent the resurrection of the demon Ozma and his devilish minions. To aid him in this pious pursuit, the Priest carries large, terrifying weapons, such as giant wooden crosses or daunting totem poles, with which he bashes open the skulls of all creatures that dare cross him. Blessed by holy power, the Priest also has limited magical ability, used for healing or enhancing himself for battle.
Contents
Second Class Advancement
Becoming the Crusader
The Priest must first reach level 18.
- Clear Burning Graquarak on expert road or higher.
- Clear Shadow Thunderland until you receive a clear quest item.
- Clear Shadow Thunderland with a party. (2+ users)
Becoming the Monk
The Priest must first reach level 18.
- Clear Burning Graquarak with 70 style points or higher.
- Clear Shadow Thunderland with A rank or higher.
- Clear Shadow Thunderland alone on expert road or higher.
Becoming the Exorcist
The Priest must first reach level 18.
- Hunt 20 Forest Zombies in Shadow Thunderland
- Hunt 20 Hallow Eyes in Shadow Thunderland
- Hunt Ghoul Guish on expert road or higher in Shadow Thunderland
| Playable Classes | |||||||||
|---|---|---|---|---|---|---|---|---|---|
| Weapons | ||||||||
|---|---|---|---|---|---|---|---|---|
| Armor, Accessories, Special Equipment, and Chronicle | ||||
|---|---|---|---|---|
--
| ||||
